2018-01-08
 526
526Laboratory work №11. Creation of video files with use Video Editing Software.
TASK: Create the video from two or more videos and photos, using the application for video edition of Windows Movie Maker.
HOW TO USE WINDOWS MOVIE MAKER
Getting started
Open the program and start a new project by going to File > New Project. Save your new project under any name you’d like, and choose a destination for the project to save to. We recommend saving as often as possible while working to avoid losing any editing progress–in the event the program or operating system crashes or freezes.
The Interface
Windows Movie Maker has three regions you use while editing your video. The top of the program is the Ribbon and it’s where you’ll access the various editing tools such as transitions, effects, captions, audio levels, and more. You’ll also add any video, photos, or audio via the add tool located on the Ribbon and can quickly save your project with the disk icon located there as well.
Below the Ribbon and to the left side of the program is the preview window. The preview window is where you view the video playback of your project and can see what the sequence would look like as a finished product. You can use the rewind, fast forward, or play button in the preview window and can also toggle full screen view for your preview.
The window located underneath the Ribbon on the right side is your storyboard, or timeline, window. This is the location of your video sequence and it also contains your imported video clips. The storyboard/timeline window is where you navigate through your clips, split them when necessary, and arrange them in the sequence.
Uploading videos and photos
With the interface more familiar and a new project created you’re able to get started with the program itself. First, you need to decide what it is you wish to edit in the program. Movie Maker offers several different ways to easily upload various video, photo, and audio files in to the program.
How to upload an entire video from a digital video (DV) camera tape
For users who have video stored on a digital video (DV) camera tape connect the camera to your computer via an IEEE 1394 connection or a USB 2.0 connection and set your camera to play back recorded video.
Note: On most DV cameras the play back recorded video button says VCR or VTR.
When the camera turns on the program will recognize the device and will display an Autoplay dialog box. Once this pops up select Import Video, name the video file you’re importing, and then save the import to your computer.
The program will ask you which format you’d like to import the video to and you’re given the option of formatting to Audio Video Interleaved (AVI and DV-AVI) or Windows Media Video File (WMV). Formatting to AVI or DV-AVI will import your video using the default file type of your digital video camera while formatting to WMV assures that the information on the video is Windows compatible.
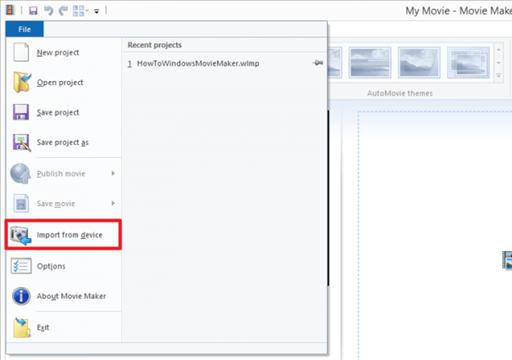
If the Autoplay dialog box doesn’t pop up when you turn your camera on just go to File > Import from device, select the source you wish to upload from then click Import.
Once you select your desired format click Import the entire videotape to my computer and then select Next to begin the upload process. When it’s complete just click Finish and your video is completely uploaded.